Thursday, May 23, 2013

Umbrella Protection

We do not get much rain here.   In fact annually is 7.10 inches!  Needless to say we do not use umbrellas much here.  A couple months ago my little family vacationed in Portland.  Now there we needed an umbrella.   A whooping 37 inches a year.  Without one you are sopping wet.  That umbrella gives the right amount of protection -- just like our husbands. 

Recently, I encountered a situation in which discernment was much needed.  But I thought that I had everything under control and did not need any input on how to proceed with decisions to be made.  Insert mistake.  Two are always better than one and plans fail for lack of counsel (Ecclesiastes 4:9 & Proverbs 15:22)

Yet to my surprise things began to unravel.  I got flustered, overwhelmed, and annoyed.  My husband made a comment insinuating that he'd seen it coming.  When did you make me aware of your concerns I retorted.  He remarked, "While you were waving your hand saying it would be no big deal."  Geeezzzz!

Lesson learned or trying to learn.  God has given my husband a great big picture perspective on things.   That is why He put us together.  I fly high and he keeps me tethered.  My hubby has an engineering brain which keeps life simple and efficient.   Getting his input is wise.  So why didn't I run things by him.  In my pride, I stepped out from under his protective cover.  Had I taken the situation to him I'm pretty sure I would have not ended up in a pickle.  

Can you picture your husband as your protective umbrella? 

Colossians 3:18 says Wives submit to your husbands as fitting for those that belong to the Lord.    

Wince.  That word submit.  Interestingly, in the Greek the word submit is made up of two words.  The first is under and the second to arrange.  Submit means to arrange under.  It is simply to place myself under my husband.   It is NOT my nature to do this.  Is it really any women's in our society?  But this is what God's word tells me to do. 

Surely Jesus there are exemptions?  Like what if I don't trust him, or he's clueless, or....ummm....that is when I remembered the last half of the verse.  "As fitting for those who belong to the Lord."  I'm a Jesus girl so no exemption.   I'm choosing to place myself under my husband out of my love and obedience to Jesus.  

When we submit, we live under our husbands protection.  There is blessing here.  I missed out on some blessings looking back.  We could have grown in our trust for one another, I would have avoided trouble, and I could have blessed him with my respect. 

This situation was not a BIGGY.  But I want to learn lessons on the easy ones, not the major ones.  I know you do too.  Here are some practical questions I can ask myself to see if I'm staying under the protection of my husband. 

Questions to ponder:
Do I ask my husband what his thoughts are on a particular situation?
Do I place a high priority on his to do list?
Do I respect his boundaries for our schedule, money or friendships?
Do I run my ideas by him?
Do I follow through on what he has asked me "to do"?


Jesus, thank you for the protection you give me through my husband.   By your Spirit help me to respectfully submit to him.   Amen


Tuesday, May 21, 2013

Hello Kitty Style

Just finished celebrating my oldest daughters Birthday - Hello Kitty Style.  What a blast we had this year.  Here are some of the fun things we did to celebrate.

Her birthday morning she awoke with shouts of delight at seeing the streamers hanging in her doorway.  Calling to her sister, "Its' my birthday!"
Five balloons to play with one for each year of her life.  Looking forward to doing this each year.  Wow that will be a lot of balloons when she is 18! That afternoon we opened gifts from family.  It was the first time I heard, "Mom, I always wanted one of these" and "This is the best birthday ever." I'm guessing it will not be my last.  Of course this warmed my heart knowing that she was trilled.  There is nothing better than blessing your children in tangible ways.  We also made her birthday cake together, Easy Ice-Cream Cake. 

Such a simple and kid-friendly recipe.  She chose the ice-cream and candy topping...skittles!  A little 'interesting' with mint cookie ice-cream.  But so fun that she got to choose.  We have a "you are special plate" that we pull out for celebrations.  Of course it always brings big smiles when it is placed on the table. 

Saturday we celebrated with friends from our church, school, and neighborhood.  The theme this year - Hello Kitty Salon.  Guests were styled and pampered with hair-dos and manicures.  
There were two stations Hair and Nails.  I picked up most of the supplies at the Dollar Store and Sally's beauty supply.  The girls loved getting pampered.  We even had fun washable, comb-in hair color.  
 
Coming up with decorations is my favorite part of party planning.  I used the party plates my daughter picked out as inspiration.  I scanned to our computer a Hello Kitty image from one of our many Hello Kitty coloring books.  I was able to use this to make the cup cake toppers and the Hello Kitty tin cans.  The garland is simply cup cake liners folded over a thin ribbon.   I made the flower like streamers with a large scalloped craft punch and scrap-booking paper.
The food was really simple crackers, cheese and strawberries.  The punch, Easy Party Punch, was a hit with the mom's as well as the kids.
There was also a photo booth for the girls to take pictures with each other complete with crowns and pink feather boas.  With 13 girls at the party it really went great.  I was concerned it would be craziness with hot curling irons and nail polish!  A BIG thank you to the moms who helped and two of our favorite babysitters who joined in on the fun too. 

I'm so thankful for times like birthday's to celebrate God's faithfulness and blessings in our lives.  James 1:7 tells us that every Good and Perfect gift is from God.  

Monday, May 13, 2013

ABC Wall Art


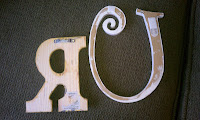
Just put up the ABC wall art in our playroom.  I am so happy with how it turned out.  It is bright, fun, and bold.  Like all great ideas these days, I got it from Pintrest.  The pin was used all the same style of letter and then covered them with different papers.  I just mixed it up a bit.   Here is how I went about this project. 

Materials
Step 1:  I combed Hobby Lobby and Micheal's for letters.   With several returns, I finally came up with the look I wanted.  I knew I wanted some to be painted and some to be covered with paper.  With some letters on sale I averaged about $3 a letter.

Step 2: Each letter had to be traced on the craft paper.  Yikes, remember to place letter backwards then when you turn it over paper will be on the right side.  Cut out each letter and use the mod podge to glue it to the corresponding wood letter.   Trim around the letter with an exacto knife.  Use a sanding block to buff up the edges.  This creates a great worn look for those of you who like the shabby style.  Then paint mod podge over each letter in order to seal the paper.

Step 3: For those letters that you want to be painted choose your paint and paint!  My big letters I had to spray paint because they were ceramic for Hobby Lobby.  The small letter were wooden.  After painting the wooden letters I buffed up the edges with a block sander.  This takes off some of paint to create the worn look.  Then I simply wiped a light oak stain over the letters.  Poof, shabby letters.

Step 4: Attach brackets and Command hangers to letters.  I just used a glue gun to attach picture hanger hooks.  There was no way I was going to tap in tiny little nails.  I LOVE the command hangers and they worked great for the letters that were not wide enough to place a picture hanger.

Step 5: In order to hang this all up I first laid it out on the floor.  This let me get a feel for how big of an area it would take along with letter placement.  I measured out the area on the wall.  It's about 6 ft. by 5 ft.  Then I marked it off with painter's tape.  Working row by row, I arranged and hung the letters.  Here is a great Pintrest tip for hanging decor.  Place a small amount of toothpaste on the back bracket.  Then place it on the wall where you want it hung.  When you pull the letter back away you will know just where to place the nail. 

Happy ABC Letter Creating!

Thursday, May 9, 2013

Kids Art Center

Another playroom project complete.  Woot!  I have been wanting to do this one for sometime.  We were running out of space in our playroom so getting the art easel up off the floor was on my "Gotta do" list.

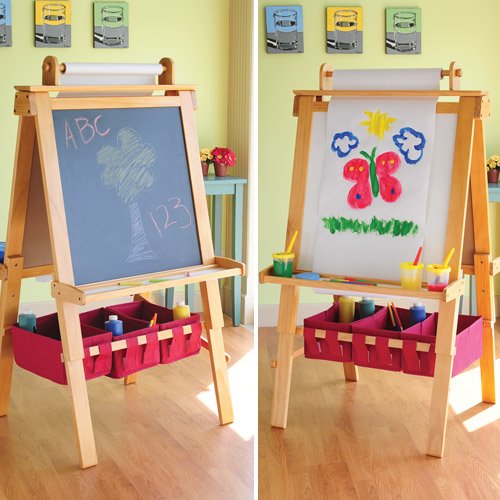
Our easel was a gift from Papa and Nana.  (Yeah for awesome grandparents.)  It was kinda of like this one.  I could not find our exact one online.  It was a Costco find a couple years ago.

I went to work with the tools and took it all apart.  Once I got it un-assembled, I laid it out on the wall, measured and marked distances.  I mounted the chalk board, dry erase board and paper holder on a half wall which over looks our homes entryway.  I had to drill holes in the top of each board in order to hang them.  All I used to mount them was drywall anchors and screws.


I used Command hooks and Dollar Store tins to create art bins.  Did you know there are "washable" dry erase markers.  They do not work as well as the "real" ones but "permanent" and kids don't mix. 

I am super happy with how this project turned out.  I should also note that I did all the installing myself!  I only give my hubby credit for doing one screw.

This is a great project which utilizes space better.  Check out Craigslist for listings on easels.  I just saw one for $20! 

Happy project making!


So They Say

This is my favorite mommy helper!  The Bumbo.  With the introduction of baby girl #3, it sure comes it handy.  We welcome her as our new decor center piece because she moves from room to room.  

So while my Bumbo was helping me yesterday, holding its precious cargo, I proceeded to get ready for my first Mother's Day Tea.  I had one of those tender moments.  They say, "They get big fast!"  We hear this from every mom.  It is one of those sayings that kinda goes in one ear and out the other.  We all nod in agreement.  But in this moment, it stuck.

Just a little less than five years ago, this same Bumbo held my first daughter while I was getting ready.  She was sweetly doing the same things.  Grabbing everything in sight. Chewing on my lip gloss.  Did I treasure it then?  Do I treasure it now?  That is my desire to treasure each crazy-tiring moment because we only hold them in our hands for a moment. 

So in this moment I chose to treasure it and give thanks.  Taking note of the simple things.  Her grabbing everything.  Her chopping on whatever was in her cubby hands.  Seeing her cubby legs sticking out with curled, tiny toes.

The time is going by fast. We will blink and they will be all grown up.  So today let's pause and find something to treasure and give thanks.

1 Thessalonians 5:18
Be thankful in all circumstances, for this is God’s will for you who belong to Christ Jesus.